Renewing an old Princess Stove
We enjoy extending cruising on our Meridian 490 and love to cook onboard. However, we have never "enjoyed" attempting to use the cooktop portion of the Princess three-burner range used on Bayliner 4788s and Meridian 490s for decades. Due to the recessed nature of the cooktop, it was impossible to utilize any "normal" sized pans without attempting to span burners or other similar gymnastics. Anything other than small to medium sauce pans, just don't fit.
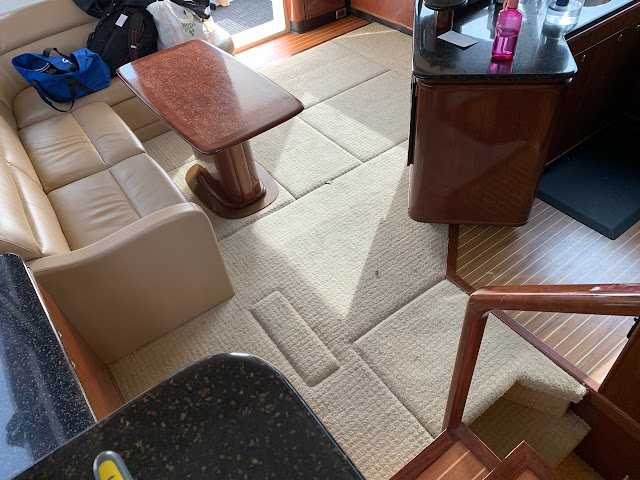
The following pictures illustrate how the stove appears as originally installed.
We are also big fans of cooking with natural gas due to the speed and control. However, we did not want to go through the process of installing a propane system on our 490. So, the next best choice is induction. I began a search for a replacement stove with an induction cooktop built in. Unfortunately, as the market for odd sized appliances is small, no such appliance seems to exist.
So, I began to research modifications made by other 4788 and 490 owners, such as removing the stove entirely and replacing with an induction cooktop and convection oven/microwave combination or induction cooktop and toaster oven, or ???? While all of these upgrades seemed to work well for the owners that did them, I wasn't excited about making that sort of change.
I started looking more carefully at the construction of the Princess range and realized that the entire cooktop could be relatively easily removed, which would likely leave a nice space to drop in an induction cooktop (if one of the right size could be located). After reviewing specifications of many, many induction cooktops, I determined that the Mini Duo from True Induction appeared to be the closest fit - http://www.trueinduction.com/Mini-Duo.aspx
In the end, we removed the cooktop portion of the stove, ran a separate electrical line, and dropped in the Mini Duo Induction cooktop. A friend that runs National Marine Exhaust cut the stainless surround piece that provides the extra polish to make this look like an OEM finished product! After finished product pictures below, the process of dismantling the cooktop is detailed–but first the inspiration to do it!
End Result


We now have an amazing and modern looking stove and cooktop with completely separate power sources. We can run both burners and the oven with full sized normal cookware! It is truly transformative for the galley. Total cost was under $500.
Installation Process:
The installation process involved two major phases, cooktop disassembly and electrical wiring.
Cooktop disassembly...
The Princess stove cooktop includes a cooktop cover and a three-burn cooktop surface. Both the cover and the cooktop surface pivot near the back to the stove. Disassembly of these structures requires pulling out the stove, as the pivot points are held together by screw and nut combinations only accessible with the stove pulled out.
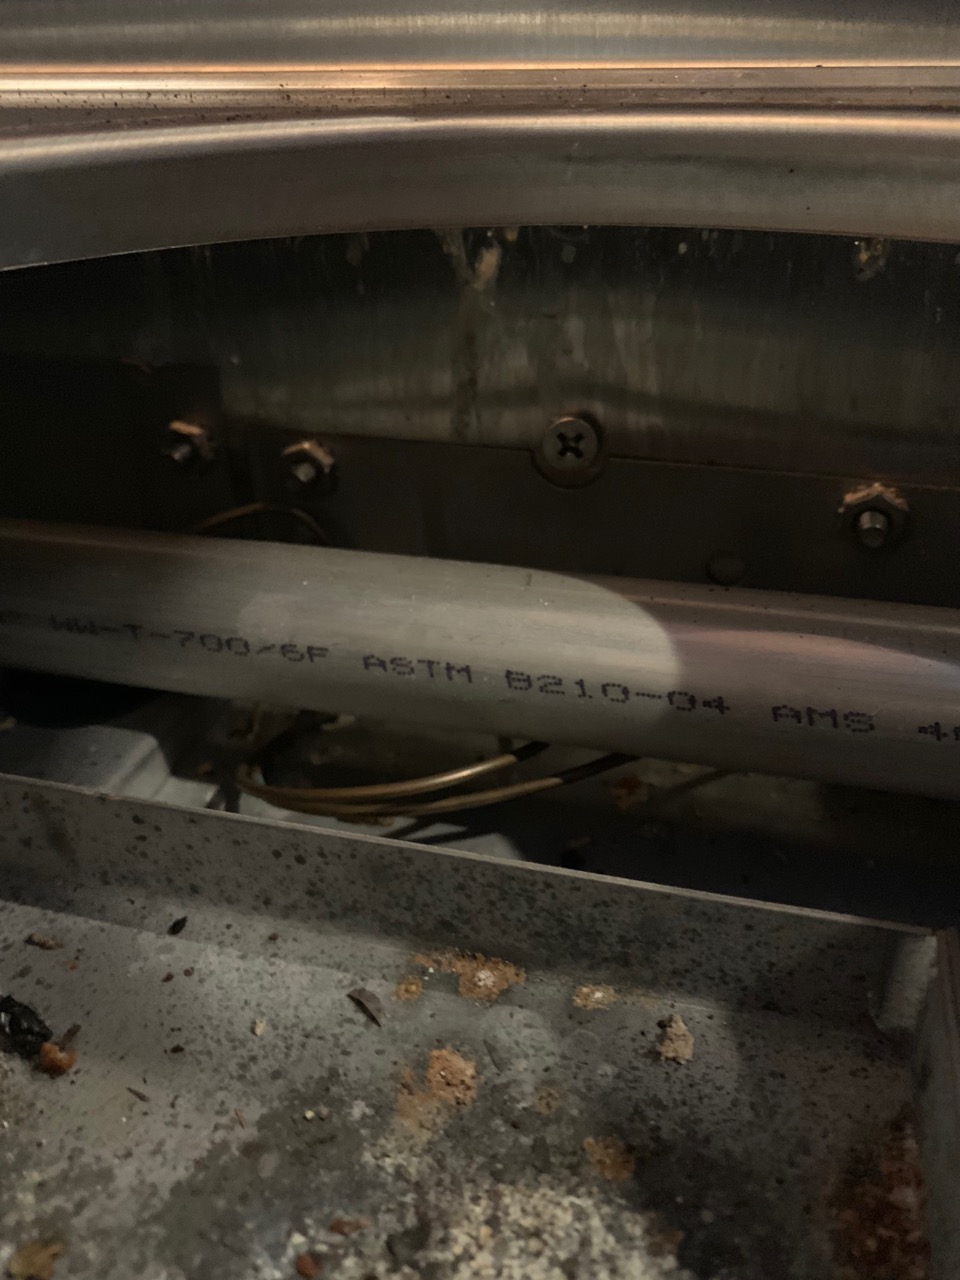
Pulling out the stove requires locating the mounting screws, which include three screws visible along the bottom of the stove (see picture) and in the case of 4788s and 490s two other screws located under the cooktop surface.
In the following image you can see both the intended side mounting screw holes (upper two holes through the stainless trim) and actual side mounting screw visible below the removed burner cavity.


The following pictures illustrate how the stove appears as originally installed.
 |
| Original Stove Configuration - Cooktop Cover Down |
 |
| Original Stove Configuration - Cooktop Cover Up |
So, I began to research modifications made by other 4788 and 490 owners, such as removing the stove entirely and replacing with an induction cooktop and convection oven/microwave combination or induction cooktop and toaster oven, or ???? While all of these upgrades seemed to work well for the owners that did them, I wasn't excited about making that sort of change.
I started looking more carefully at the construction of the Princess range and realized that the entire cooktop could be relatively easily removed, which would likely leave a nice space to drop in an induction cooktop (if one of the right size could be located). After reviewing specifications of many, many induction cooktops, I determined that the Mini Duo from True Induction appeared to be the closest fit - http://www.trueinduction.com/Mini-Duo.aspx
In the end, we removed the cooktop portion of the stove, ran a separate electrical line, and dropped in the Mini Duo Induction cooktop. A friend that runs National Marine Exhaust cut the stainless surround piece that provides the extra polish to make this look like an OEM finished product! After finished product pictures below, the process of dismantling the cooktop is detailed–but first the inspiration to do it!
End Result


We now have an amazing and modern looking stove and cooktop with completely separate power sources. We can run both burners and the oven with full sized normal cookware! It is truly transformative for the galley. Total cost was under $500.
Installation Process:
The installation process involved two major phases, cooktop disassembly and electrical wiring.
Cooktop disassembly...
The Princess stove cooktop includes a cooktop cover and a three-burn cooktop surface. Both the cover and the cooktop surface pivot near the back to the stove. Disassembly of these structures requires pulling out the stove, as the pivot points are held together by screw and nut combinations only accessible with the stove pulled out.
Pulling out the stove requires locating the mounting screws, which include three screws visible along the bottom of the stove (see picture) and in the case of 4788s and 490s two other screws located under the cooktop surface.
 |
| Lower Mounting Screws Under Oven Cavity |

The following image shows a closer view of one of the side mount screws, which are just randomly inserted through the side of the stove into wood structure along each side of the stove cavity.
After getting the stove pulled out, screws holding the cooktop cover and cooktop burner surface can be accessed and removed–starting with the cooktop cover. The following image shows the screws from the side of the stove.

Once you have removed the cooktop cover and cooktop burner surface, the stove will look (more or less) as shown in the following picture. The picture also shows a small back cover plate removed with an electrical wire coming up from the back of the stove, this is how I ran power to the new cooktop.

Electrical Hookup
For the electrical hookup there are a number of potential options. I choose to run a completely new circuit all the way back to the main breaker panel. We had a spare AC circuit available and wanted the cooktop on a separate circuit if possible. I also assisted with a similar upgrade in a friend's 4788 where we just tapped into the circuit running the trash compactor. Tapping into the trash compactor circuit was much easier, and should provide a solid solution as avoiding running the trash compactor while cooking is not too difficult. BTW, the induction cooktop we are using is rated for use on a 15 amp standard outlet.
To get the new circuit in a position to plug in (or hard wire in) the new cooktop, a hole was drilled into the back panel of the stove. I highly recommend removing the back panel to put in the new hole, as there are other wires and insulation that should not be disturbed.
The wire is then routed up through the small access panel, which we also drilled a hole in as shown below.

The Mini Duo is shipped with a standard three-prong AC plug, so I decided to just wire up an outlet behind where the new cooktop sits within the cavity left by the removed cooktop elements. Utilizing a plug will allow for quick replacement should that ever be necessary.

All of the old burner plugs were left in place, as the stove has a cut off switch that can no longer be activated rendering them inactive. Leaving them also will allow for reversing this "upgrade" should someone wish to do so in the future.
From here all that remained to obtain the nicely finished product was to fill in the hole left behind the new cooktop.

As mentioned above, we were able to get assistance on cutting and forming (one simple bend) a beautiful piece of sheet stainless to surround the cooktop and fill in the hole. As the cooktop needs to be vented, we choose to have our boat name cut into the surround to provide venting and a cool look. Heat resistant double sided tape was used to secure the surround stainless, which so far is working perfectly.
We have assisted with this upgrade to two other Princess stoves (pictures below):
 |
| Beautiful example done for a Chris Craft |
 |
| Nearly Complete Install in a 4788 |
Love what you did with this drop in top. Would your friend be willing to make another of the stainless surrounds for the cooktop to drop into. I of course would pay him.
ReplyDeleteAll Floors Australia knows that buying new flooring is a big investment in your home which involves making important choices. From our showrooms, to delivery to installation to maintenance, you can rely on All Floors Australia to help you every step of the way in creating the home of your dreams.
ReplyDeleteTimber Flooring in Hoppers Crossing
Pigeon Induction Stove
ReplyDeleteBest Induction Stove in India
best induction stove under 5000
best induction stoveunder 3000
best induction stove brand
best induction stove under 2000
how to clean induction stove
Thanks for sharing such Informational Blog. If needs Stove Fans visit our site.
ReplyDeleteNice article, By the way if you are looking for best induction cooktop in india then check out our website.
ReplyDeleteThe consistent heating of the bottom of the cookware set with a flat bottom is the perfect Pan for Electric Stoves with level surfaces. Copper, stainless steel, and aluminum cookware are ideal for electric burner cooking because of their high heat conductivity.
ReplyDeleteGood article, but it would be better if in future you can share more about this subject. Keep posting.
ReplyDeleteplumber services in rawalpindi,
This blog seems sharing interesting tips as i was looking for ceramic installers near me, keep sharing such updates.
ReplyDelete